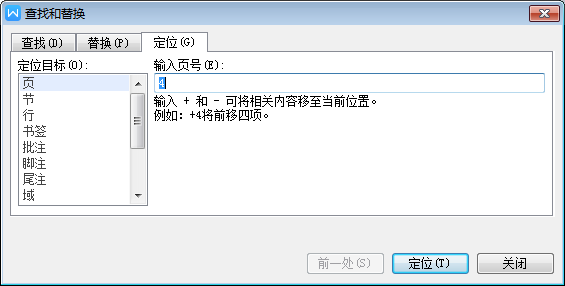
如何快速选中当前页(如何快速选中内容)
634
2022-05-29

易扩展
大数据量,高性能
灵活的数据模型
安装与启动
安装mongodb:sudo apt-get install -y mongodb-org
安装可视化管理界面:https://robomongo.org/download
查看帮助:mongod –help
启动服务:sudo service mongod start
停止服务:sudo service mongod stop
重启服务:sudo service mongod restart
查看进程:ps ajx|grep mongod
配置文件的位置:/etc/mongod.conf
默认端口:27017
日志的位置:/var/log/mongodb/mongod.log
查看当前的数据库:db
查看所有的数据库:show dbs /show databases
切换数据库:use db_name
删除当前的数据库:db.dropDatabase()
当集合不存在时,插入任何一条数据集合自动创建。
或者手动创建集合:db.createCollection(name,[options])
其中options:
参数capped: 默认值为false表示不设置上限,值为true表示设置上限 参数size: 当capped值为true时,需要指定此参数,表示上限大小,当文档达到上限时,会将之前的数据覆盖,单位为字节
当集合存在时:
查看集合:show collections
删除集合:db.集合名称.drop()
Object ID:文档ID
String: 字符串,最常使用,必须是有效的UTF-8
Boolean: 存储一个布尔值,true或false
Integer: 整数可以是32位或64位,这取决于服务器
Double: 存储浮点值
Arrays: 数组或列表, 多个值存储到一个键
Object: 用于嵌入式的文档, 即一个值为一个文档
Null: 存储Null值
Timestamp: 时间戳,表示从1970-1-1到现在的总秒数
Date: 存储当前日期或时间的UNIX时间格式
注意点:
创建日期语句如下 :参数的格式为YYYY-MM-DD new Date('2017-12-20') 每个文档都有一个属性,为_id,保证每个文档的唯一性 可以自己去设置_id插入文档,如果没有提供,那么MongoDB为每个⽂档提供了一个独特的_id,类型为objectID objectID是一个12字节的十六进制数: 前4个字节为当前时间戳 接下来3个字节的机器ID 接下来的2个字节中MongoDB的服务进程id 最后3个字节是简单的增量值
插入数据(字段_id存在就报错):db.集合名称.insert(document)
插入数据(字段_id存在就更新):db.集合名称.save(document)
举个栗子:
#插入文档时,如果不指定_id参数,MongoDB会为文档分配一个唯一的ObjectId db.xianyu.insert({name:"xianyuplus",age:"3"}) #插入文档时,可以指定_id参数 db.xianyu.insert({_id:"10001",name:"xianyuplus",age:"30"}) #更新了上面_id为1001的文档 db.xianyu.save({_id:"10001",name:"xianyuplus",age:"40"})
查询数据:db.集合名称.find()
举个栗子:
db.xianyu.find()
更新数据:db.集合名称.update(
参数query:查询条件 参数update:更新操作符 参数multi:可选,默认是false,表示只更新找到的第一条记录,值为true表示把满足条件的文档全部更新
举个栗子:
原有内容: { "_id" : ObjectId("5b66f05f1194e110103bc283"), "name": "xianyuplus", "age": "40" } # 将name为xianyuplus的值替换为xianyuplus1 db.xianyu.update({name:"xianyuplus"},{name:"xianyuplus1"}) 操作后内容: { "_id" : ObjectId("5b66f05f1194e110103bc283"), "name": "xianyuplus1" }
可以看到单单使用update更新数据会导致原有数据被新数据替换,所以我们应该搭配$set使用,指定更新对应的键值。
举个栗子:
原有内容: { "_id" : ObjectId("5b66f05f1194e110103bc283"), "name": "xianyuplus", "age": "40" } # 将name为xianyuplus的值更新为xianyuplus1 db.xianyu.update({name:"xianyuplus"},{$set:{name:"xianyuplus1"}}) 操作后内容: { "_id" : ObjectId("5b66f05f1194e110103bc283"), "name": "xianyuplus1", "age": "40" }
更新多条数据:使用参数multi:true
举个栗子:
# 更新全部数据的name值为xianyuplus1 db.stu.update({},{$set:{name:"xianyuplus1"}},{multi:true})
注意:multi update only works with $ operators 即multi只要和$搭配使用时才能起效。
删除数据:db.集合名称.remove(
参数query:可选,删除的文档的条件 参数justOne:可选,如果设为true或1,则只删除一条,默认fals,表示删除多条
举个栗子:
# 把name值为xianyuplus的数据全部删掉 db.xianyu.remove({name:"xianyuplus"})
查询文档:db.集合名称.find({条件文档})
查询一条数据:db.集合名称.findOne({条件文档})
格式化查询:db.集合名称.find({条件文档}).pretty()
举个栗子:
# 查询name为xianyuplus的数据 db.xianyu.find({name:"xianyuplus"}) # 查询一条name为xianyuplus的数据 db.xianyu.findOne({name:"xianyuplus"})
等于:如上述栗子
大于:$gt ( greater than )
大于等于:$gte ( greater than equal )
小于:$lt ( less than )
小于等于:$lte ( less than equal )
不等于:$nt ( not equal )
举个栗子:
# 查询age大于20的数据 db.xianyu.find({age:{$gt:20}}) # 查询age大于等于20的数据 db.xianyu.find({age:{$gte:20}}) # 查询age小于20的数据 db.xianyu.find({age:{$lt:20}}) # 查询age小于等于20的数据 db.xianyu.find({age:{$lte:20}}) # 查询age不等于20的数据 db.xianyu.find({age:{$ne:20}})
and:在find条件文档中写入多个字段条件即可
or:使用$or
举个栗子:
#查找name为xianyuplus且age为20的数据 db.xianyu.find({name:"xianyuplus",age:20}) #查找name为xianyuplus或age为20的数据 db.xianyu.find({$or:[{name:"xianyuplus"},{age:20}]}) #查找name为xianyuplus或age大于20的数据 db.xianyu.find({$or:[{age:{$gt:20}},{name:"xianyuplus"}]}) #查找age大于等于20或gender为男并且name为xianyuplus的数据 db.xianyu.find({$or:[{gender:"true"},{age:{$gte:18}}],name:"xianyuplus"})
使用$in与$nin判断是否在某一范围内
举个栗子:
#查询年龄为18、28的数据 db.xianyu.find({age:{$in:[]18,28}})
使用//或$regex编写正则表达式
举个栗子:
# 查询name以xian开头的数据 db.xianyu.find({name:/^xianyu/}) db.xianyu.find({name:{$regex:'^xianyu'}})
查询前n条数据:db.集合名称.find().limit(NUMBER)
跳过n条数据:db.集合名称.find().skip(NUMBER)
举个栗子:
#查询前3条数据 db.xianyu.find().limit(3) #查询3条后的数据 db.xianyu.find().skip(3) #skip和limit可以搭配使用,查询4,5,6条数据 db.xianyu.find().skip(3).limit(3)
使用$where自定义查询,这里使用的是js语法
举个栗子:
//查询age大于30的数据 db.xianyu.find({ $where:function() { return this.age>30;} })
投影:在查询结果中只显示你想要看到的数据字段内容。
db.集合名称.find({},{字段名称:1,...})
想显示的字段设置为1,不想显示的字段不设置,而_id这个字段比较特殊,想要他不显示需要设置_id为0。
#查询结果中只显示name字段,不显示age db.xianyu.find({},{name:1})
排序:db.集合名称.find().sort({字段:1,...})
将需要排序的字段设置值:升序为1,降序为-1
举个栗子:
#先按照性别降序排列再按照年龄升序排列 db.xianyu.find().sort({gender:-1,age:1})
统计数目:db.集合名称.find({条件}).count()
db.集合名称.count({条件})
举个栗子:
#查询age为20的数据个数 db.xianyu.find({age:20}).count() #查询age大于20,且性别为nan的数据个数 db.xianyu.count({age:{$gt:20},gender:true})
去重:db.集合名称.distinct('去重字段',{条件})
举个栗子:
#去除家乡相同,且年龄大于18的数据 db.xianyu.distinct('hometown',{age:{$gt:18}})
聚合(aggregate)是基于数据处理的聚合管道,每个文档通过一个由多个阶段(stage)组成的管道,可以对每个阶段的管道进行分组、过滤等功能,然后经过一系列的处理,输出相应的结果。
用法:db.集合名称.aggregate({管道:{表达式}})
常用管道:
$group: 将集合中的文档分组, 可用于统计结果 $match: 过滤数据, 只输出符合条件的文档 $project: 修改输出文档的结构, 如重命名、 增加、 删除字段、 创建计算结果 $sort: 将输出文档排序后输出 $limit: 限制聚合管道返回的文档数 $skip: 跳过指定数量的文档, 并返回余下的文档 $unwind: 将数组类型的字段进行拆分
常用表达式:表达式:"列名"
$sum: 计算总和, $sum:1 表示以一倍计数 $avg: 计算平均值 $min: 获取最小值 $max: 获取最大值 $push: 在结果文档中插入值到一个数组中 $first: 根据资源文档的排序获取第一个文档数据 $last: 根据资源文档的排序获取最后一个文档数据
$group:将文档进行分组以便于统计数目
用法:_id表示分组依据,_id:"$字段名"
举个栗子:
#按照hometown分组,并计数 db.xianyu.aggregate({$group:{_id:"$hometown", count:{$sum:1}}}) #将集合中所有的内容分为一组,统计个数 db.xianyu.aggregate({$group:{_id:null, count:{$sum:1}}})
$project:修改输入文档的结构,如:重命名,增加、删除字段等
举个栗子:
#按照hometown分组,并计数 #分组输出,只显示count字段 db.xianyu.aggregate( {$group:{_id:"$hometown", count:{$sum:1}}}, {$project:{_id:0,count:1}} )
$match:用于过滤数据,只输出符合条件的文档,功能和find类似,但是match是管道命令,能将结果交给后一个管道,但是find不可以。
举个栗子:
#查询age大于20 #按照hometown分组,并计数 #分组输出,只显示count字段 db.xianyu.aggregate( {$match:{age:{$gte:20}}}, {$group:{_id:"$hometown", count:{$sum:1}}}, {$project:{_id:0,count:1}} )
$sort:将输入文档排序后输出
举个栗子:
#查询age大于20 #按照hometown分组,并计数 #分组输出,只显示count字段 #按照计数升序排序 db.xianyu.aggregate( {$match:{age:{$gte:20}}}, {$group:{_id:"$hometown", count:{$sum:1}}}, {$project:{_id:0,count:1}}, {$sort:{count:1}} )
$limit:限制聚合管道返回的文档数
$skip:跳过指定数量的文档数,返回剩下的文档
举个栗子:
#查询age大于20 #按照hometown分组,并计数 #按照计数升序排序 #跳过前一个文档,返回第二个 db.xianyu.aggregate( {$match:{age:{$gte:20}}}, {$group:{_id:"$hometown", count:{$sum:1}}}, {$sort:{count:1}}, {$skip:1}, {$limit:1} )
$unwind:将文档中的某一个数组类型字段拆分成多条, 每条包含数组中的一个值
db.集合名称.aggregate({$unwind:'$字段名称'})
举个栗子:
db.xianyu.insert({_id:1,item:'t-shirt',size:['S','M','L']}) db.xianyu.aggregate({$unwind:'$size'}) 输出: { "_id" : 1, "item" : "t-shirt", "size" : "S" } { "_id" : 1, "item" : "t-shirt", "size" : "M" } { "_id" : 1, "item" : "t-shirt", "size" : "L" }
$group对应的字典中有几个键,结果中就有几个键
分组依据需要放到_id后面
取不同的字段的值需要使用
,
‘
,`
,‘gender,$age`
取字典嵌套的字典中的值的时候$_id.country
能够同时按照多个键进行分组
{$group:{_id:{country:"$字段",province:"$字段"}}}
结果是:{_id:{country:"",province:""}
用法:db.集合.ensureIndex({属性:1}),1表示升序, -1表示降序
创建唯一索引:db.集合.ensureIndex({"属性":1},{"unique":true})
创建唯一索引并消除:
db.集合.ensureIndex({"属性":1},{"unique":true,"dropDups":true})
建立联合索引:db.集合.ensureIndex({属性:1,age:1})
查看当前集合的所有索引:db.集合.getIndexes()
删除索引:db.集合.dropIndex('索引名称')
备份:mongodump -h dbhost -d dbname -o dbdirectory
-h: 服务器地址,也可以指定端口号 -d: 需要备份的数据库名称 -o: 备份的数据存放位置,此目录中存放着备份出来的数据
恢复:mongorestore -h dbhost -d dbname --dir dbdirectory
-h: 服务器地址 -d: 需要恢复的数据库实例 --dir: 备份数据所在位置
安装:pip install pymongo
导入模块:from pymongo import MongoClient
实例化对象以链接数据库,连接对象有host,port两个参数。
from pymongo import MongoClient class clientMongo: def __init__(self): client = MongoClient(host="127.0.0.1", port=27017) #使用[]括号的形式选择数据库和集合 self.cliention = client["xianyu"]["xianyuplus"]
插入单条数据:返回ObjectId
def item_inser_one(self): ret = self.cliention.insert({"xianyu":"xianyuplus","age":20}) print(ret)
插入多条数据:
def item_insert_many(self): item_list = [{"name":"xianyuplus{}".format(i)} for i in range(10000)] items = self.cliention.insert_many(item_list)

查询单条数据:
def item_find_one(self): ret = self.cliention.find_one({"xianyu":"xianyuplus"}) print(ret)
查询多条数据:
def item_find_many(self): ret = self.cliention.find({"xianyu":"xianyuplus"}) for i in ret: print(i)
更新一条数据:
def item_update_one(self): self.cliention.update_one({"xianyu":"xianyuplus"},{"$set":{"xianyu":"xianyu"}})
更新全部数据:
def item_update(self): self.cliention.update_many({"xianyu":"xianyuplus"},{"$set":{"xianyu":"xianyu"}})
删除一条数据:
def item_delete_one(self): self.cliention.delete_one({"xianyu":"xianyuplus"})
删除符合条件的数据:
def item_delete_many(self): self.cliention.delete_many({"xianyu":"xianyuplus"})
【绽放吧!数据库】有奖征文火热进行中:https://bbs.huaweicloud.com/blogs/285617
MongoDB Python 开发者 数据库
版权声明:本文内容由网络用户投稿,版权归原作者所有,本站不拥有其著作权,亦不承担相应法律责任。如果您发现本站中有涉嫌抄袭或描述失实的内容,请联系我们jiasou666@gmail.com 处理,核实后本网站将在24小时内删除侵权内容。