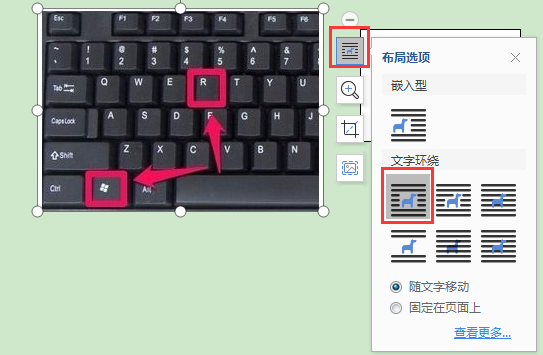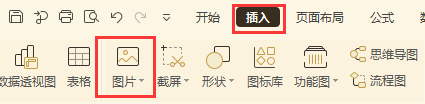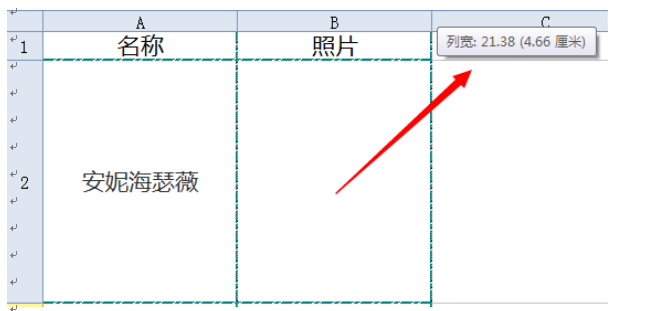
在表格中插入多张图片,但是图片都很大,怎么样操作能使插入的图片自动适应每一个单元格的大小,从而不用每
1491
2022-05-30

Android 上传图片到服务器
一、Android端选择图片并显示
1.设计item
2.设计数据类
3.编写适配器,将数据装配到视图上
4.核心代码
4.1打开相册的方式
4.2打开拍照的方式
4.2.1兼容7.0后的拍照
4.3获取图片
4.4.单文件上传图片核心代码
4.5.多文件上传图片核心代码
二、服务器端
一、Android端选择图片并显示
1.设计item
我们将使用RecyclerView来展示我们选择好的图片。因此我们首先要设计item,item有两种:添加按钮、图片。
添加按钮item:add_image_button_item.xml
")
1
2
3
4
5
6
7
8
9
10
11
12
13
14
15
16
17
2.设计数据类
数据类中有我们的图片数据:ImageFileBean.java。
public class ImageFileBean { private File file; // 图片文件 private boolean isUpload = false; //标识该文件是否上传 private Bitmap bitmap;// 图片 private boolean startUpload; // 标识图片是否开始上传,以此控件ProgressBar的显示 public ImageFileBean(File file, int pg) { this.file = file; } public ImageFileBean(File file, Bitmap bitmap,boolean isUpload) { this.file = file; this.isUpload = isUpload; this.bitmap = bitmap; } ... }
1
2
3
4
5
6
7
8
9
10
11
12
13
14
15
16
17
将图片数据与添加按钮统一处理的数据类:ItemBean.java。
public class ItemBean { private boolean isButton; // 是否是添加图片的按钮 private ImageFileBean imageFileBean; public ItemBean(){} public ItemBean(ImageFileBean bean,boolean isButton){ this.imageFileBean = bean; this.isButton = isButton; } ... }
1
2
3
4
5
6
7
8
9
10
11
12
3.编写适配器,将数据装配到视图上
LoadImageAdapter.java:
package com.wong.imageupload; import android.view.LayoutInflater; import android.view.View; import android.view.ViewGroup; import android.widget.ImageView; import android.widget.ProgressBar; import androidx.annotation.NonNull; import androidx.recyclerview.widget.RecyclerView; import java.util.List; public class LoadImageAdapter extends RecyclerView.Adapter
1
2
3
4
5
6
7
8
9
10
11
12
13
14
15
16
17
18
19
20
21
22
23
24
25
26
27
28
29
30
31
32
33
34
35
36
37
38
39
40
41
42
43
44
45
46
47
48
49
50
51
52
53
54
55
56
57
58
59
60
61
62
63
64
65
66
67
68
69
70
71
72
73
74
75
76
77
78
79
80
81
82
83
84
85
86
87
88
89
90
91
92
93
94
95
96
97
98
99
100
101
102
103
104
105
106
107
108
109
110
111
112
113
114
115
116
117
118
119
120
121
122
123
124
4.核心代码
4.1打开相册的方式
// 这种方式是通过action方式打开android的其他app来完成的 Intent galleryIntent = new Intent(Intent.ACTION_PICK); // 系统默认的图片选择程序 galleryIntent.setType("image/*"); startActivityForResult(galleryIntent,REQUEST_GALLERY);
1
2
3
4
获取选中的图片:
Uri uri = data.getData();
1
2
4.2打开拍照的方式
// 这种方式是通过action方式打开android的其他app来完成的 // MediaStore.ACTION_IMAGE_CAPTURE 即android.media.action.IMAGE_CAPTURE Intent cameraIntent = new Intent(MediaStore.ACTION_IMAGE_CAPTURE);// 系统的相机程序 // 准备图片名称 String imageName = UUID.randomUUID().toString().replace("-","")+".jpg"; // 创建应用内缓存目录cache/images CacheUtils.createImagesCacheFolder(MainActivity.this); File cameraFile = new File(CacheUtils.getCacheImagesFolder(MainActivity.this).getPath()+"/"+imageName); // 创建好图片文件接收拍照的数据 if(!cameraFile.exists()){ try { cameraFile.createNewFile(); } catch (IOException e) { e.printStackTrace(); } } if(Build.VERSION.SDK_INT > Build.VERSION_CODES.M) { // 在官方7.0的以上的系统中,尝试传递 file://URI可能会触发FileUriExposedException。7.0以上的系统需要使用FileProvider兼容拍照 cameraUri = FileProvider.getUriForFile(MainActivity.this, "com.wong.camera.fileprovider", cameraFile); }else{ cameraUri = Uri.fromFile(cameraFile); } cameraIntent.putExtra(MediaStore.EXTRA_OUTPUT,cameraUri); startActivityForResult(cameraIntent,REQUEST_CAMERA);
1
2
3
4
5
6
7
8
9
10
11
12
13
14
15
16
17
18
19
20
21
22
23
24
在官方7.0的以上的系统中,尝试传递 file://URI可能会触发FileUriExposedException。7.0以上的系统需要使用FileProvider兼容拍照:
第一步:在AndroidManifest.xml加入以下内容。
1
2
3
4
5
6
7
8
9
第二步:新建资源目录xml,并配置FileProvider的资源目录。
fileprovider.xml:
1
2
3
4
5
6
7
8
9
10
11
12
13
14
15
16
通过URI获取图片:
Bitmap bitmap = null; if(uri != null){ try { BitmapFactory.Options options = new BitmapFactory.Options(); options.inSampleSize = 2; // 图片宽高都为原来的二分之一,即图片为原来的四分之一 bitmap = BitmapFactory.decodeStream(this.getContentResolver().openInputStream(uri), null, options); String filePath = uri.getEncodedPath();; File file = new File(filePath); }catch (Exception e){ } }
1
2
3
4
5
6
7
8
9
10
11
12
4.3获取图片
/** * 将Uri图片类型转换成File,BitMap类型 * 在界面上显示BitMap图片,以防止内存溢出 * 上传可选择File文件上传 * * @param uri */ private void saveUriToFile(Uri uri,int from) { Bitmap bitmap = null; if (uri != null) { try { BitmapFactory.Options options = new BitmapFactory.Options(); options.inSampleSize = 2; // 图片宽高都为原来的二分之一,即图片为原来的四分之一 bitmap = BitmapFactory.decodeStream(this.getContentResolver().openInputStream(uri), null, options); File file = null; switch (from){ case REQUEST_GALLERY: String filePath = FileUtils.getRealFilePath(this,uri); File oldFile = new File(filePath); // 修改文件名 String newFileName = UUID.randomUUID().toString().replace("-","")+".jpg"; String newFilePath = oldFile.getParent()+"/"+newFileName; file = new File(newFilePath); oldFile.renameTo(file); break; case REQUEST_CAMERA: file = cameraFile; break; } if(file == null || !file.exists()){ Log.i("异常:","文件不存在!"); } list.remove(addImgButton); // 先删除 if (list.size() < DEFAULT_NUM) { ItemBean itemBean = new ItemBean(new ImageFileBean(file, bitmap, false), false); list.add(itemBean); if (list.size() < DEFAULT_NUM) { // 如果图片数量还没有达到最大值,则将添加按钮添加到list后面 list.add(addImgButton); } } adapter.notifyDataSetChanged(); } catch (Exception e) { } } }
1
2
3
4
5
6
7
8
9
10
11
12
13
14
15
16
17
18
19
20
21
22
23
24
25
26
27
28
29
30
31
32
33
34
35
36
37
38
39
40
41
42
43
44
45
46
47
48
49
50
51
4.4.单文件上传图片核心代码
在form表单中enctype属性规定了form表单在发送到服务器时候编码方式,它有如下的三个值:
①application/x-www-form-urlencoded:默认的编码方式。但是在用文本的传输和MP3等大型文件的时候,使用这种编码就显得 效率低下。
②multipart/form-data:指定传输数据为二进制类型,比如图片、mp3、文件。
③text/plain:纯文体的传输。空格转换为 “+” 加号,但不对特殊字符编码。
private void uploadImage(final ImageFileBean fileBean) { File file = fileBean.getFile(); if (file == null) return; if(!file.exists()){ Toast.makeText(this, "文件不存在!", Toast.LENGTH_SHORT).show(); return; } viewHolder.mTVText.setText("HashCode#"+SHA256.getSHA256(file)); Log.i("文件HashCode:",SHA256.getSHA256(file)); // 准备Body RequestBody requestBody = new MultipartBody.Builder() .setType(MultipartBody.FORM) .addFormDataPart("name",file.getName())// 其他信息 .addFormDataPart("id","12,13,14")// 其他信息 .addFormDataPart("type","2")// 其他信 .addFormDataPart("file", file.getName(), RequestBody.create(MediaType.parse("multipart/form-data"), file))//文件 .build(); Request request = new Request.Builder() .url(Global.UPLOAD_URL).post(requestBody) .addHeader("user-agent", "PDA") .addHeader("x-userid", "752332")// 添加x-userid请求头 .addHeader("x-sessionkey", "kjhsfjkaskfashfuiwf")// 添加x-sessionkey请求头 .addHeader("x-tonce", Long.valueOf(System.currentTimeMillis()).toString())// 添加x-tonce请求头 .addHeader("x-timestamp", Long.valueOf(System.currentTimeMillis()).toString())// 添加x-timestamp请求头 .build(); OkHttpClient okHttpClient = new OkHttpClient(); final Message msg = myHandler.obtainMessage(); okHttpClient.newCall(request).enqueue(new Callback() { @Override public void onFailure(@NotNull Call call, @NotNull IOException e) { msg.obj = fileBean; msg.what =0; myHandler.sendMessage(msg); } @Override public void onResponse(@NotNull Call call, @NotNull Response response) throws IOException { String result = response.body().string(); Log.i("上传图片结果:", result); msg.obj = fileBean; if (!response.isSuccessful()) { Log.i("响应失败:", response.code() + ""); msg.what =1; return; } msg.what = 3; myHandler.sendMessage(msg); } }); }
1
2
3
4
5
6
7
8
9
10
11
12
13
14
15
16
17
18
19
20
21
22
23
24
25
26
27
28
29
30
31
32
33
34
35
36
37
38
39
40
41
42
43
44
45
46
47
48
49
50
51
52
53
54
55
4.5.多文件上传图片核心代码
请参考《Android 上传图片到服务器(多文件上传)》
二、服务器端
服务端我们选择用SpringBoot来实现,非常简单:
/** * 单文件上传 * * @param file * @param model * @param request * @return */ @PostMapping("/api/upload") public String fileUpload(@RequestParam(value = "file") MultipartFile file, Model model, HttpServletRequest request, @RequestParam(value = "type") int type, @RequestHeader(value = "user-agent") String userAgent) { if (file.isEmpty()) { System.out.println("文件为空空"); } logger.info("获得的其他参数type=" + type); logger.info("获得的Header user-agent=" + userAgent.toString()); // 如果参数比较少可以直接在方法上使用注解@RequestParam来映射到不同的名称上获得,当然如果不用此注解,也可以定义一个与传过来的参数名一样的形参来获得 // 蒜从客户端传过来的其他参数 Enumeration names = request.getParameterNames(); while (names.hasMoreElements()) { String key = names.nextElement().toString(); logger.info("客户端传过来的参数#key=" + key + ",value=" + request.getParameterValues(key).toString()); } Enumeration headers = request.getHeaderNames(); while (headers.hasMoreElements()) { String key = headers.nextElement().toString(); String info = "客户端传过来的Header参数:key=" + key + ",value=" + request.getHeader(key); logger.info(info); } // BMP、JPG、JPEG、PNG、GIF String fileName = file.getOriginalFilename(); // 文件名 logger.info("上传文件名:" + fileName); String suffixName = fileName.substring(fileName.lastIndexOf(".")); // 后缀名 // 验证上传的文件是否图片 if (!".bmp".equalsIgnoreCase(suffixName) && !".jpg".equalsIgnoreCase(suffixName) && !".jpeg".equalsIgnoreCase(suffixName) && !".png".equalsIgnoreCase(suffixName) && !".gif".equalsIgnoreCase(suffixName)) { return "上传失败,请选择BMP、JPG、JPEG、PNG、GIF文件!"; } fileName = UUID.randomUUID() + suffixName; // 新文件名 File dest = new File(fileName); // 如果文件的父路径不存在,则创建 if (fileName.startsWith("/") && !dest.getParentFile().exists()) { dest.getParentFile().mkdirs(); } // 开始存放文件到指定目录去 try { file.transferTo(dest); return "上传成功"; } catch (IOException e) { e.printStackTrace(); return "上传失败"; } }
1
2
3
4
5
6
7
8
9
10
11
12
13
14
15
16
17
18
19
20
21
22
23
24
25
26
27
28
29
30
31
32
33
34
35
36
37
38
39
40
41
42
43
44
45
46
47
48
49
50
51
52
53
54
55
56
57
58
59
60
61
同时在application.yml配置文件配置上传的目录:
spring: servlet: multipart: location: /home/kyun/Downloads/recFiles
1
2
3
4
Android客户端
文件上传服务器
附:HTTP请求报文
用WireShark软件对Android发起请求时的数据进行拦截,得到的HTTP请求的报文:
Hypertext Transfer Protocol POST /api/upload HTTP/1.1\r\n [Expert Info (Chat/Sequence): POST /api/upload HTTP/1.1\r\n] [POST /api/upload HTTP/1.1\r\n] [Severity level: Chat] [Group: Sequence] Request Method: POST Request URI: /api/upload Request Version: HTTP/1.1 user-agent: PDA\r\n x-userid: 752332\r\n x-sessionkey: kjhsfjkaskfashfuiwf\r\n x-tonce: 1591980645278\r\n x-timestamp: 1591980645278\r\n Content-Type: multipart/form-data; boundary=27fba8d3-a15a-40f6-8880-e0af1932914b\r\n Content-Length: 48558\r\n [Content length: 48558] Host: 192.168.43.120:8080\r\n Connection: Keep-Alive\r\n Accept-Encoding: gzip\r\n \r\n [Full request URI: http://192.168.43.120:8080/api/upload] [HTTP request 1/1] [Response in frame: 334] File Data: 48558 bytes MIME Multipart Media Encapsulation, Type: multipart/form-data, Boundary: "27fba8d3-a15a-40f6-8880-e0af1932914b" [Type: multipart/form-data] First boundary: --27fba8d3-a15a-40f6-8880-e0af1932914b\r\n Encapsulated multipart part: Content-Disposition: form-data; name="name"\r\n Content-Length: 36\r\n\r\n Data (36 bytes) Data: 353636386333306432636638346534613834323364383837… [Length: 36] Boundary: \r\n--27fba8d3-a15a-40f6-8880-e0af1932914b\r\n Encapsulated multipart part: Content-Disposition: form-data; name="id"\r\n Content-Length: 8\r\n\r\n Data (8 bytes) Data: 31322c31332c3134 [Length: 8] Boundary: \r\n--27fba8d3-a15a-40f6-8880-e0af1932914b\r\n Encapsulated multipart part: Content-Disposition: form-data; name="type"\r\n Content-Length: 1\r\n\r\n Data (1 byte) Data: 32 [Length: 1] Boundary: \r\n--27fba8d3-a15a-40f6-8880-e0af1932914b\r\n Encapsulated multipart part: (multipart/form-data) Content-Disposition: form-data; name="file"; filename="5668c30d2cf84e4a8423d887527fd069.jpg"\r\n Content-Type: multipart/form-data\r\n Content-Length: 47952\r\n\r\n The multipart dissector could not find a required parameter. [Expert Info (Error/Protocol): The multipart dissector could not find a required parameter.] [The multipart dissector could not find a required parameter.] [Severity level: Error] [Group: Protocol] Data (47952 bytes) Data: ffd8ffe12ee245786966000049492a00080000000b001001… [Length: 47952] Last boundary: \r\n--27fba8d3-a15a-40f6-8880-e0af1932914b--\r\n
1
2
3
4
5
6
7
8
9
10
11
12
13
14
15
16
17
18
19
20
21
22
23
24
25
26
27
28
29
30
31
32
33
34
35
36
37
38
39
40
41
42
43
44
45
46
47
48
49
50
51
52
53
54
55
56
57
58
59
60
61
62
63
64
Android
版权声明:本文内容由网络用户投稿,版权归原作者所有,本站不拥有其著作权,亦不承担相应法律责任。如果您发现本站中有涉嫌抄袭或描述失实的内容,请联系我们jiasou666@gmail.com 处理,核实后本网站将在24小时内删除侵权内容。